

Translating your PHP website is essential for reaching a global audience. Azbox provides a powerful PHP library that simplifies the localization process by managing translations in the cloud and automatically translating your website content. This guide will walk you through the complete process of translating a PHP website using Azbox, from project setup to implementation.
Understanding Azbox PHP Integration
Azbox is a cloud-based translation management platform that allows you to:
- Manage translations centrally in the Azbox cloud platform
- Automatically translate your website content
- Support multiple languages without code changes
- Update translations in real-time
- Import existing keywords from your website
- Collaborate with translators through the Azbox platform
Prerequisites
Before getting started, ensure you have:
- PHP 7.0 or higher installed
- Composer (optional, but recommended)
- Azbox Account: Paid Azbox plan (Starter or higher)
- Azbox Project: Configured Azbox project with your translations
- API Key and Project ID from your Azbox project
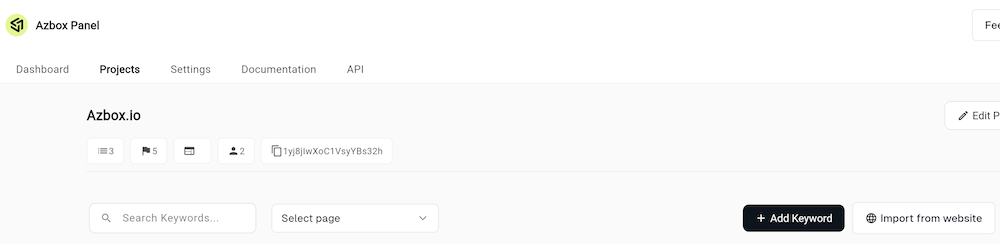
Step 1: Create a Web Project in Azbox
The first step is to create a new project in your Azbox dashboard. Your project will be your operational base for managing your website translations.
- Log in to your Azbox dashboard
- Click the Create Project button in the top right corner of the dashboard
- A popup will appear where you can configure your project:
- Project Name: Enter a descriptive name for your project
- Project Type: Select Web as the project type
- Languages: Select your original language and the destination languages you want to translate into
- Members: Optionally add team members to collaborate on translations
- Click Create to finish setting up your project
Your project will now appear in your dashboard, and you’ll be able to see your Project ID which you’ll need for the integration.
Step 2: Import Keywords from Your Website
If you already have a website with Azbox installed, you can import all existing keywords automatically. This saves you time by not having to add keywords manually.
- In your project dashboard, click the Import from website button (the button with a globe icon)
- A modal dialog will appear titled “Import from website”
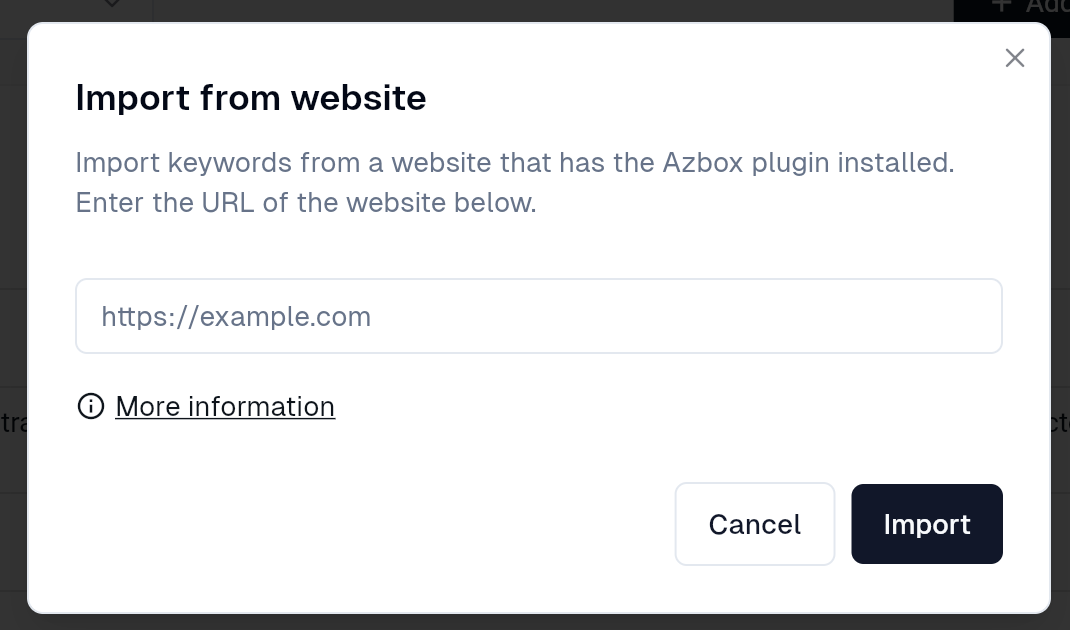
- Enter the URL of your website that has the Azbox plugin installed (e.g.,
https://example.com) - Click Import to start the import process
Azbox will automatically scan your website and import all the keywords that are being used. This includes:
- All text content that needs translation
- Keywords from your existing Azbox installation
- Content structure and organization
After the import is complete, you’ll see all your keywords in the project dashboard, ready to be translated or managed.
Manual Keyword Management
If you prefer to add keywords manually or need to add new ones:
- Click the Add Keyword button in the top right corner
- Enter the keyword text
- Optionally assign it to a category
- The keyword will be automatically translated to all your configured languages
Step 3: Install the Azbox PHP Library
There are two ways to install the Azbox PHP library: using Composer (recommended) or manual installation.
Install with Composer (Recommended)
If you’re using Composer, install the package via Composer:
composer require azbox/azbox-phpThis will automatically download the library and its dependencies.
Manual Installation
If you don’t use Composer, you can download the library manually:
- Download the
azbox.phpfile and thelibdirectory from the Azbox PHP repository - Copy them to your project directory
- Include the file in your PHP code:
require_once 'path/to/azbox.php';Step 4: Get Your Azbox Credentials
Before configuring the library, you’ll need to get your credentials from your Azbox project:
- API Key: Found in your Azbox project settings
- Project ID: Your Azbox project identifier (visible in your project dashboard)
You can find these in your Azbox dashboard under your project settings or in the project overview.
Step 5: Configure Azbox in Your PHP Application
To initialize Azbox, you need to add the initialization code at the beginning of your PHP execution. This is usually done in index.php or your main application entry point.
Basic Configuration
Here’s the basic configuration code:
<?php
// If using Composer
require __DIR__ . '/vendor/autoload.php';

// If using manual installation
// require_once 'path/to/azbox.php';

\Azbox\AZ::Instance(array(
    "api_key" => "YOUR API KEY", // Your API key from Azbox panel
    "projectId" => "YOUR PROJECT ID", // Your project ID from the Azbox panel
    "original_language" => "en", // The original language of your website
    "destination_languages" => "es,fr,de", // Languages you want to translate into (comma-separated)
    "buttonOptions" => array(
        "fullname" => true,
        "is_dropdown" => true,
        "position" => "bottom-right",
    ),
));
?>
Complete Configuration Example
Here’s a more complete example with all available options:
<?php
// Composer autoload
require __DIR__ . '/vendor/autoload.php';

\Azbox\AZ::Instance(array(
    "api_key" => "YOUR API KEY",
    "projectId" => "YOUR PROJECT ID",
    "original_language" => "en",
    "destination_languages" => "es,fr,de",
    "button_position" => "top-right", // Position of the language selector
    "buttonOptions" => array(
        "fullname" => false, // Show language code (EN, FR) instead of full name
        "with_name" => true, // Show language name in button
        "is_dropdown" => true // Use dropdown instead of list
    ),
    "exclude_blocks" => ".logo,nav #brand", // CSS selectors to exclude from translation
    "exclude_url" => "/terms-conditions,/privacy-policy", // URLs to exclude from translation
    "home_url" => "/my-website" // Subdirectory if your site is not at root
));
?>
Configuration Parameters
Required Parameters
api_key(string): Your API key that gives you access to Azbox services. You can get one by creating an account at https://panel.azbox.io/registerprojectId(string): Your project ID from the Azbox paneloriginal_language(string): The language of your original website. Enter the two-letter code (e.g., “en”, “es”, “fr”). See the complete list of supported languagesdestination_languages(string): The languages you want to translate into. Enter the two-letter codes separated by commas (e.g., “es,fr,de”). See the complete list of supported languages
Optional Parameters
-
button_position(string, default"bottom-right"): Position of the language selector button. Options:"bottom-left"- Bottom left corner"bottom-center"- Bottom center"bottom-right"- Bottom right corner (default)"top-left"- Top left corner"top-center"- Top center"top-right"- Top right corner
-
buttonOptions(array): An array of parameters to customize the language button design:is_dropdown(bool, defaulttrue):trueif the button is a dropdown list,falseto show all languages as a listwith_name(bool, defaulttrue):trueto show the name of the language in the buttonfullname(bool, defaulttrue):trueto show the full name of the language (English, Français,…),falseto show the language code (EN, FR,…)
-
exclude_blocks(string, default""): Comma-separated list of CSS selectors. You can exclude parts of your website from being translated (e.g.,.logo,nav #brand) -
exclude_url(string, default""): Comma-separated list of relative URLs. You can exclude URLs of your website from being translated (e.g.,/terms-conditions,/privacy-policy) -
home_url(string, default""): Enter the subdirectory if your website is not at the root. For instance, if your website is athttp://localhost/website/, then enter/website
Custom Button Placement
By default, the language button appears at the position you specify. However, you can also place the button anywhere you want in your HTML page by adding this div:
<div id="azbox_here"></div>Place this div wherever you want the language selector to appear, and Azbox will render the button there instead of using the default position.
You can also customize the button appearance by adding CSS rules targeting the button’s element classes.
Step 6: Verify the Integration
Now, when you visit your website, you should see a language selector button at the specified position (default: bottom right).
- Check the Button: The language selector should be visible on your website
- Test Language Switching: Click on the button and select a different language
- Verify Translation: Your website content should be translated automatically
If the button appears and language switching works, your integration is successful!
Step 7: Managing Translations
Once your website is integrated with Azbox, you can manage translations through the Azbox dashboard:
Viewing Keywords
All keywords from your website will appear in your project dashboard. You can:
- Search for specific keywords
- Filter by categories
- View translation status for each language
Editing Translations
- Click on a keyword to expand it
- Click the Translate button
- Review and edit automatic translations
- Add manual translations if needed
- Assign categories to organize keywords
Categories
Categories help you organize keywords. You can:
- Create categories by expanding the “Select categories” dropdown
- Assign keywords to categories
- Filter keywords by category
Categories can represent different elements of your website such as:
- Screens or pages
- Sections or blocks
- Features or modules
Performance Optimization
Azbox automatically caches translations in your visitors’ browsers to provide faster language switching. Once a page is translated, subsequent language changes will be instant without needing to reload from the server. This improves the user experience and reduces server load.
Caching Benefits
- Faster Language Switching: Translations are cached locally
- Reduced Server Load: Less API calls needed
- Better User Experience: Instant language changes
- Offline Support: Cached translations work offline
Troubleshooting
Button Not Appearing
If the language button doesn’t appear on your website:
- Check PHP Errors: Make sure there are no PHP errors in your error log
- Verify API Key: Ensure your API key is correct
- Check Project ID: Verify your Project ID is correct
- Initialization Order: Make sure Azbox initialization code runs before any HTML output
- File Paths: Verify that the Azbox library files are in the correct location
404 Errors When Switching Languages
If you see 404 or “Not found” errors when switching languages:
- Initialization Location: Azbox code must run at the beginning of your PHP code, before any request processing
- Rewrite Rules: Ensure your web server rewrite rules are configured so that PHP code runs on 404 pages
- Check Error Logs: Review your PHP and web server error logs for issues
Translations Not Working
If translations aren’t appearing:
- Verify Keywords: Check that keywords exist in your Azbox project
- Language Configuration: Ensure destination languages match your project configuration
- Cache Issues: Clear your browser cache and try again
- API Connection: Verify your API key has proper permissions
Still Having Issues?
If you’re still experiencing problems:
- Contact Azbox support at support@azbox.io
- Use the live chat on the Azbox website
- Check the Azbox PHP documentation
- Review the GitHub repository for examples
Best Practices
Security
- Never commit API keys to version control
- Use environment variables or configuration files outside the web root
- Restrict API key permissions in your Azbox dashboard
Organization
- Use categories to organize keywords by page or section
- Name keywords descriptively for easier management
- Review automatic translations before publishing
Performance
- Exclude unnecessary elements from translation using
exclude_blocks - Cache translations are handled automatically by Azbox
- Monitor API usage in your Azbox dashboard
Maintenance
- Regularly review translations for accuracy
- Update keywords when content changes
- Test language switching after major updates
Example: Complete Working Setup
Here’s a complete example of a simple PHP page with Azbox integrated:
index.php:
<?php
// Initialize Azbox at the very beginning
require __DIR__ . '/vendor/autoload.php';
\Azbox\AZ::Instance(array(
"api_key" => "YOUR_API_KEY",
"projectId" => "YOUR_PROJECT_ID",
"original_language" => "en",
"destination_languages" => "es,fr,de",
"button_position" => "bottom-right",
"buttonOptions" => array(
"fullname" => true,
"is_dropdown" => true,
),
));
?>
<!DOCTYPE html>
<html lang="en">
<head>
<meta charset="UTF-8">
<meta name="viewport" content="width=device-width, initial-scale=1.0">
<title>My Website</title>
</head>
<body>
<header>
<h1>Welcome to My Website</h1>
<nav>
<a href="/">Home</a>
<a href="/about">About</a>
<a href="/contact">Contact</a>
</nav>
</header>
<main>
<section>
<h2>About Us</h2>
<p>This is a sample website that demonstrates Azbox integration.</p>
</section>
<section>
<h2>Our Services</h2>
<ul>
<li>Web Development</li>
<li>Translation Services</li>
<li>Consulting</li>
</ul>
</section>
</main>
<footer>
<p>© 2025 My Website. All rights reserved.</p>
</footer>
</body>
</html>This example demonstrates:
- Proper Azbox initialization at the beginning
- Simple HTML structure that will be automatically translated
- Language selector button at the bottom right (default position)
Additional Resources
- Azbox PHP Documentation
- Azbox GitHub Repository
- List of Supported Languages
- Azbox Quickstart Guide
- Azbox API Documentation
Conclusion
Integrating Azbox into your PHP website is straightforward and provides powerful translation management capabilities. By following this guide, you can:
- Set up a web project in Azbox
- Import existing keywords from your website
- Install and configure the Azbox PHP library
- Manage translations through the Azbox dashboard
- Provide a seamless multilingual experience for your users
The automatic translation and caching features make it easy to support multiple languages without significant development overhead. Start translating your PHP website today and reach a global audience!

